

YouTube Content Editing
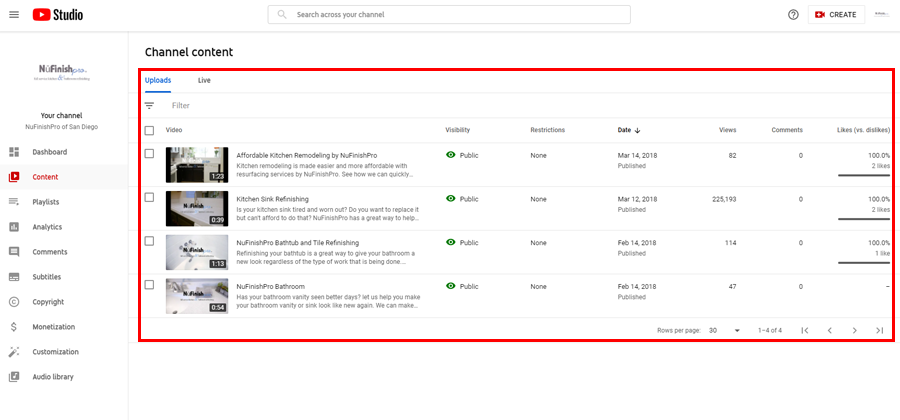
All the videos uploaded are located here.
For all of the YouTube channel’s items that are located in the Content Menu. You can view all of your uploaded and streamed videos. Competed live streams is saved on YouTube are here on the Channel Content page. Edit all content on the channel by using the provided tools.
To begin move the mouse arrow over the video to display a row of editing options in the menu.
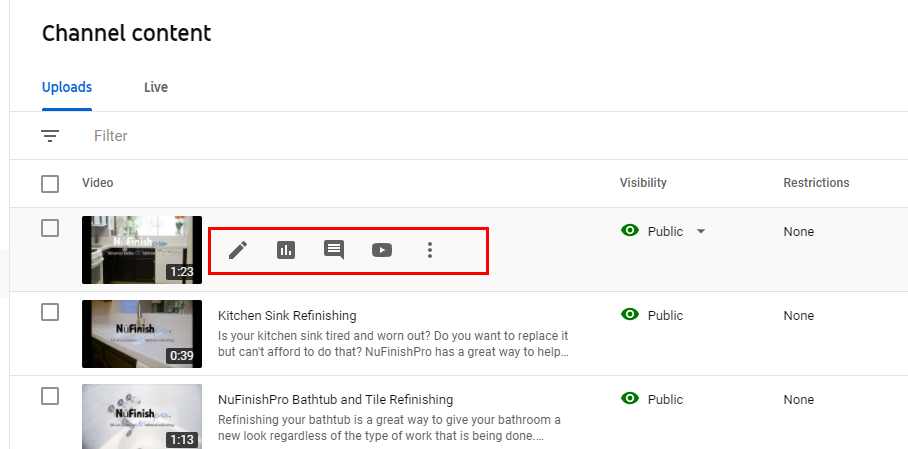
You have the choice to Edit, view the analytic, view the comments, or view the content on YouTube. The three dots will show you more options like deleting and downloading the videos. Simply move the mouse arrow over the item that you want to go to.
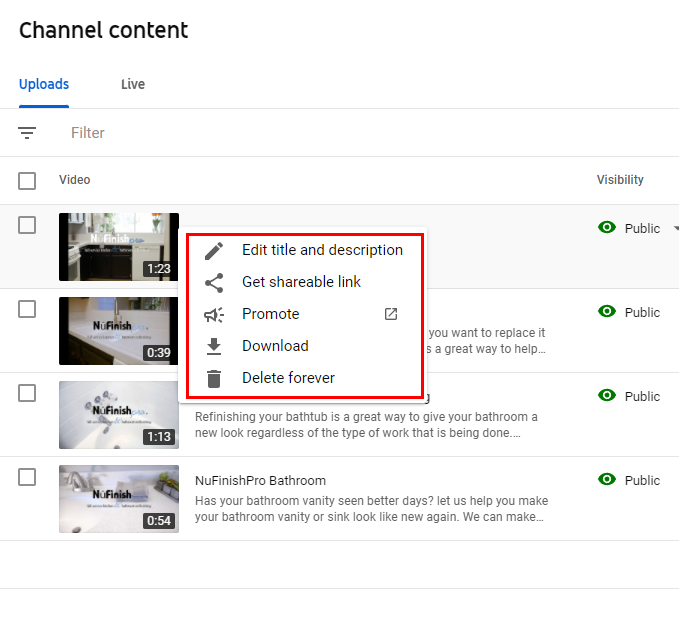
When you click on the three dots, a drop-down menu will appear. You can choose from a few more options in the menu. Google decides the video is ready to be promoted, then the link will be active. The option to delete items is located on this menu as well.
Video Details
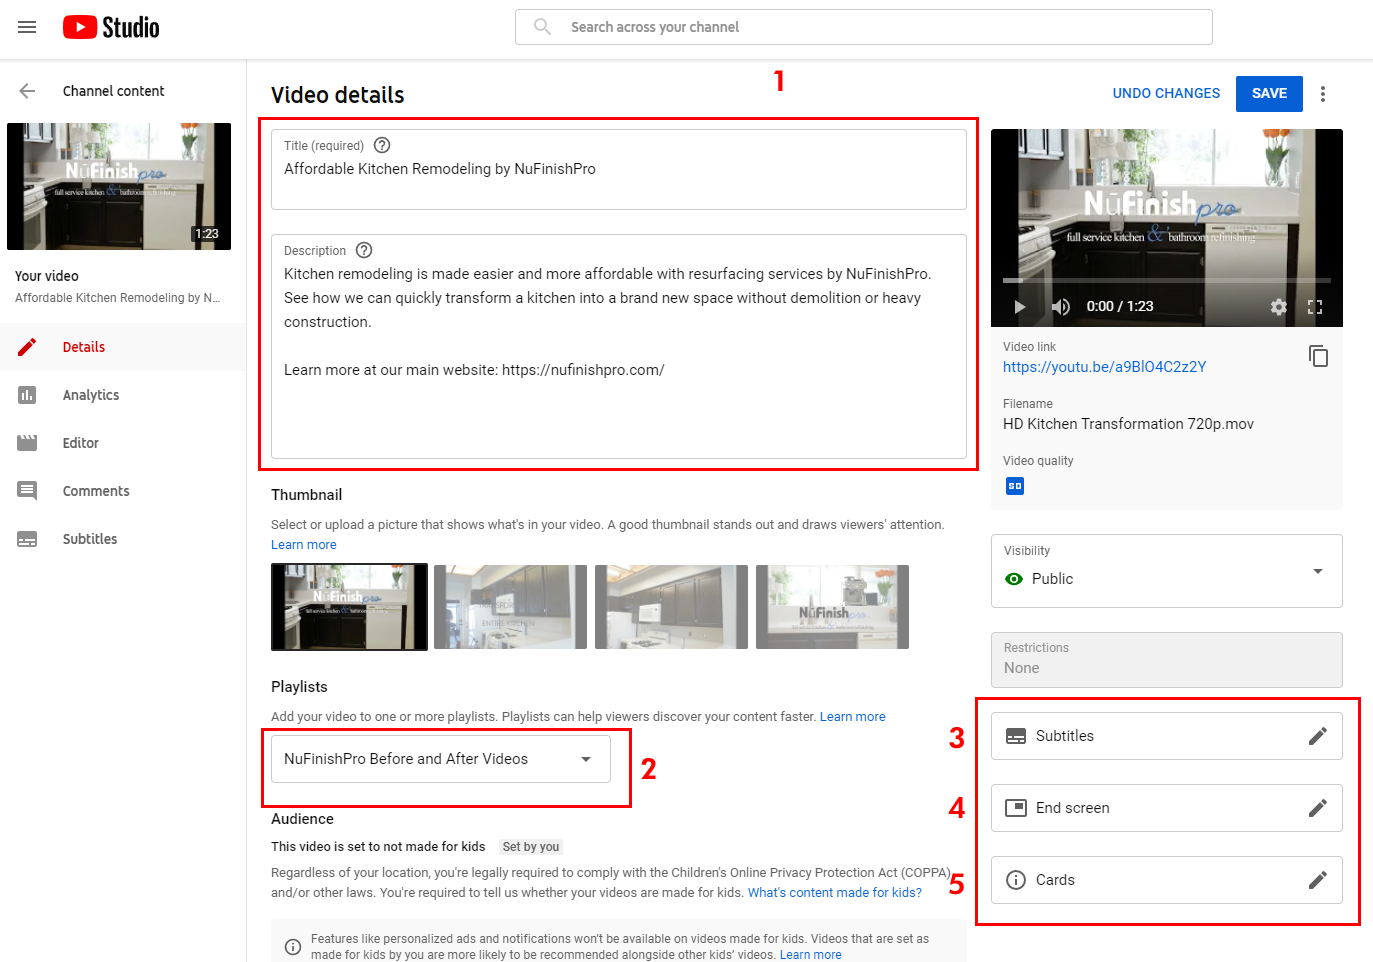
Each video in your channel will have its own unique details dashboard. You will be able to edit the content, view the analytics, comments, and subtitles. Use the Youtube content editor to change the subtitle. thumbnail, subtitles, end screen, and cards.
- Change the text in the two text fields at the top of the page by adding your title and description.
- Assign a video to an existing playlist with the drop-down menu.
- You can use this link to add or change the subtitles.
- Create a screen at the end of the video with a subscription link, links to related videos, and other information.
- A YouTube card shows the text, links, and other info about a specific part of the video.
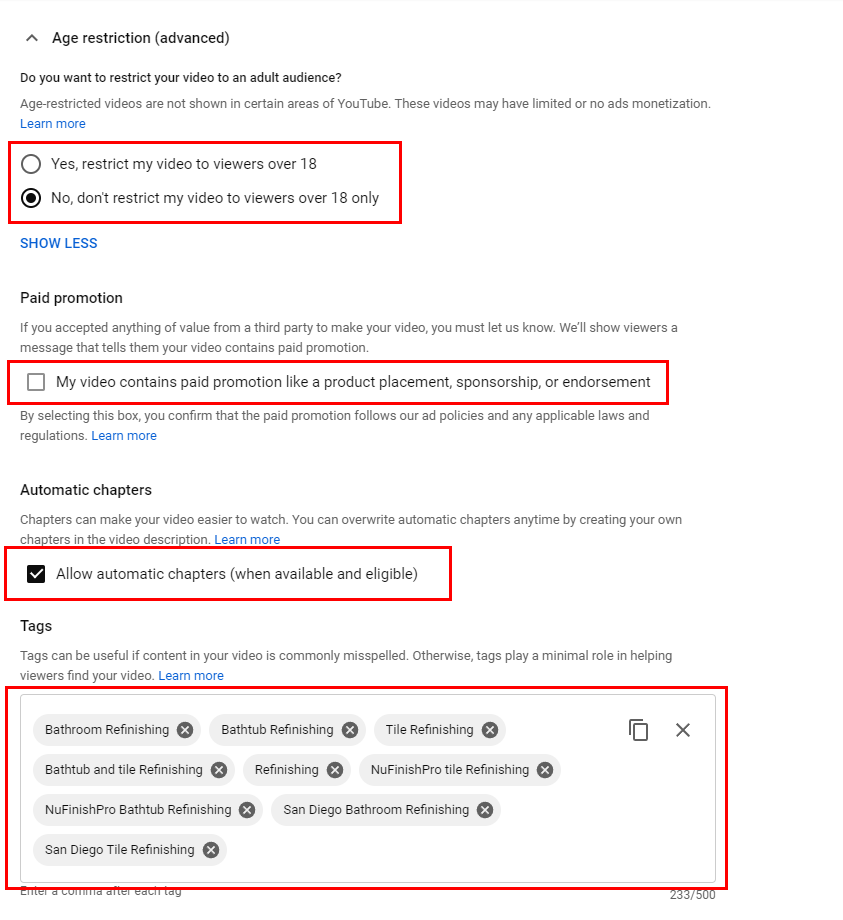
If you want to view more options, click on “show more”. Further down the page are settings for age restrictions, paid promotions, auto. adding chapters, and adding tags to a video. Click on the radio button or check the box to change the settings to these different sections. You can add or remove the tags assigned by clicking on the x to delete a tag or take the text tool and click inside of the text box to add a new tag.
Other Options
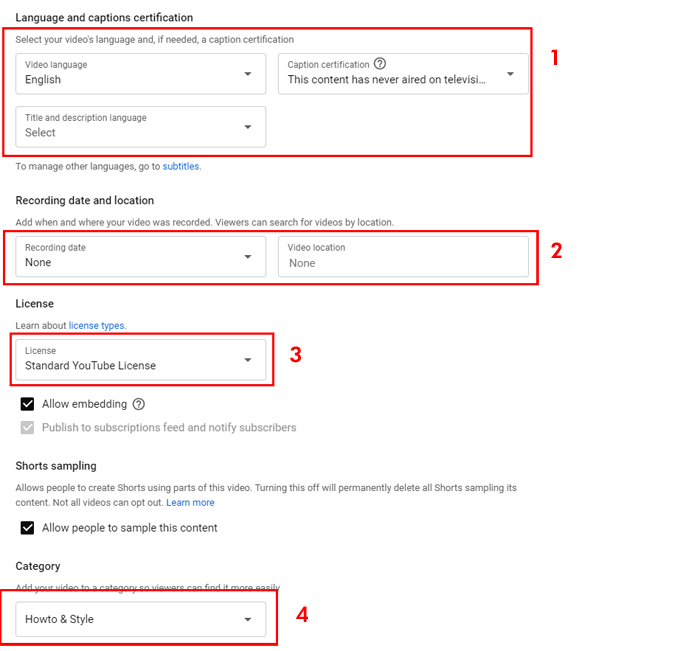
There are more options farther down the page to change the default language, recording date, type of license, and video category.
- The video is given a default language, you can add an additional language, caption certification, title, and description language. Pick one of the options by clicking on the drop-down menu to change the settings.
- The default is none, the option to add a recording date and location is available. The dropdown menu allows you to pick a recording date by clicking on the calendar. Start typing the name of the filming location, a drop-down menu will appear offering some suggestions.
- A standard YouTube license covers the uploads and streams. The other choice is to use creative commons as a license. To learn more about Creative Commons please see the link below.
- Change the category from the list of choices in the drop down menu.
Creative Commons on YouTube
Comments and Ratings
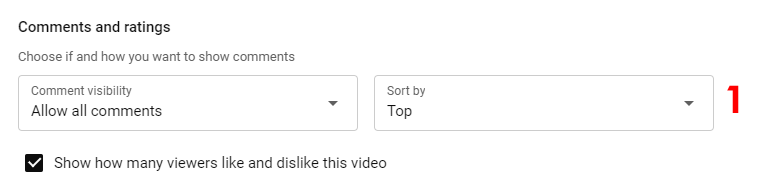
The very last option at the bottom of the page is to either allow or disallow comments. Allowing comments is on by default, click on the drop-down menu to change the video’s options. The second drop-down menu allows you to change the sort order.
Video Thumbnails
All videos have the ability to add a video thumbnail, when a video is uploaded, there is a gray box titled “Upload Thumbnail” A image that represents the content of the video can be created and added to the beginning of the video.
- When you click on the gray box, a dialog box will appear, click on the image that you want to add to the beginning of the video. When you have added the thumbnail to the video, it will show up at the beginning of the video strip in “Thumbnails” below “Video Details”. To learn more, click on the link below for more information.
End Screens
An end screen is something that you see on many YouTube videos, you can create one yourself after you add a video to your channel. To Begin click on the End screen button link on the right-hand side of the details page. After that, a popup window will then appear to let you create a screen for the video.
- Choose a template for your end screen. A number of different options are available to choose from.
- To begin, choose the one you want to use, it will then show up on the preview on the right.
- Move the mouse arrow over to the preview on the right. Using the mouse arrow click on the part of the template you want to change.
- You will get more options are available after changes are made.
- You can choose from one of the options that will appear on the left side of the window.
- Next, move the dark gray and blue strips to the back of the video timeline.
- One of the strips is the subscription name, and the other sets when the other video links will appear on the screen.
- Ideally, you want to move the two strips to the back of the timeline with about 10 seconds or so for the end screen to appear.
- Also, if you move the gray and blue bars too far to the left, the end screen will appear sooner.
Adding content to the ending.
To add a video to the end screen, click on the box with the title “Video: best video ever”. There will be three options to choose from, click on the third one “Choose a specific video”. All of the videos in your channel will appear, click on the video you want to add.
Finishing the end screen
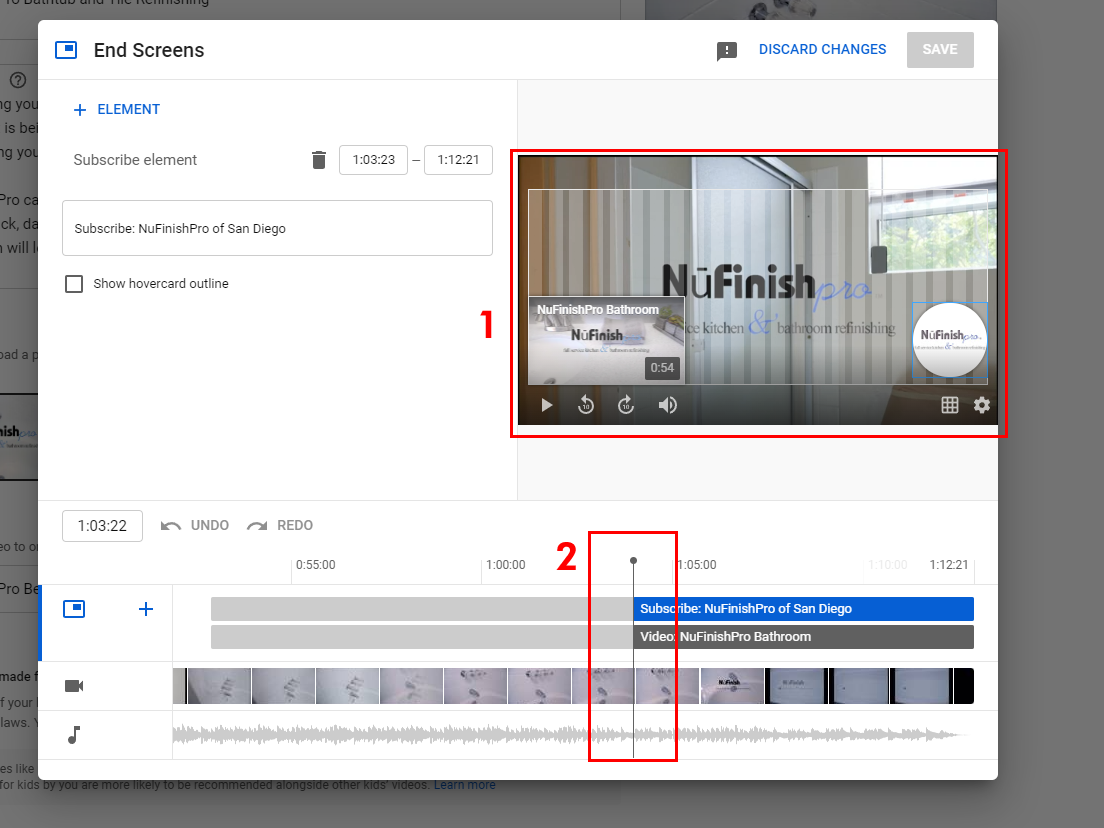
When you have made all your changes, the end screen should look something like the image below. The image on the right will show a preview of what the end screen looks like, and when it will appear.
- The video that was chosen is on the left, and our subscribe icon is on the right of the preview.
- The blue and gray bars are in the spot of the timeline when the end screen is shown, and how long it will run. Then, move the slider bars left to have the end screen appear sooner, and right to have it appear later.
After you have added the video and made all of your changes. Click on the “Save” button to save any changes that have been made.
YouTube information items
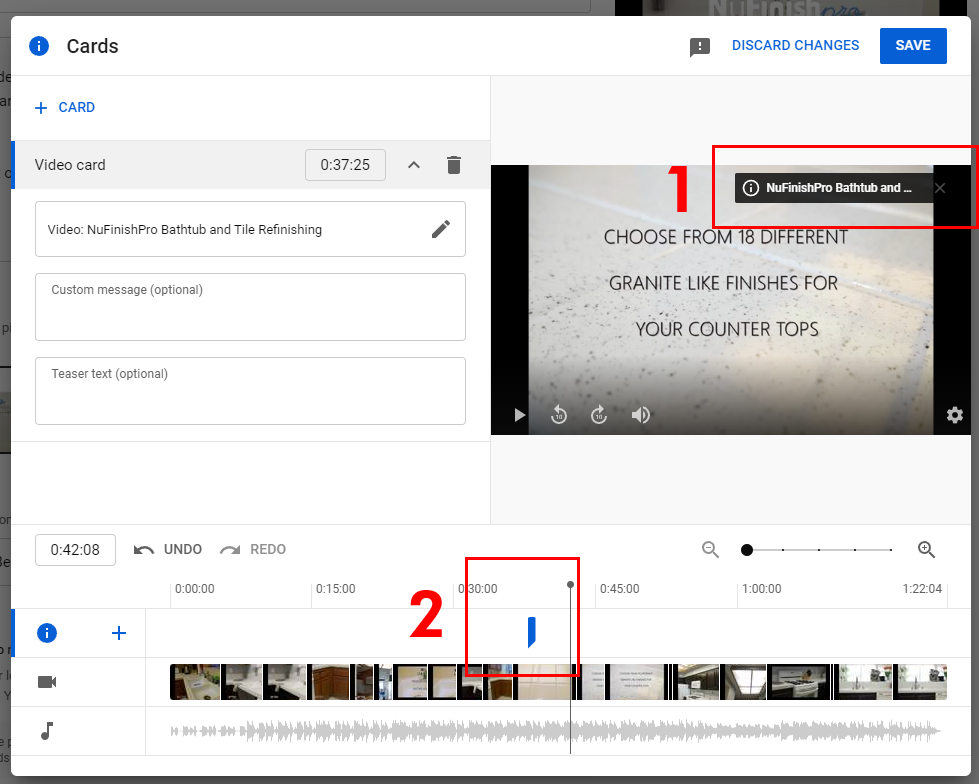
YouTube Cards are an important source of info. in a video, the creator can add additional info. By adding a video card, you can add a link, another YouTube channel, a Playlist, or a link to an outside website
To begin click on the type of card that you want to add to the video, you will see a popup window appear over your existing window. Type in the name of the channel you want to add or choose from an existing item that appears below the search bar. When you are done, the window closes.
- The card will appear in the top right-hand corner of the thumbnail. When the video plays, the item will appear and allow the viewer to click on the link.
- Move the blue-colored card marker in the timeline to a different part of the timeline to change where the info will appear.
After that, click on “Save” to apply the changes that you have made to the item.
Editing a video
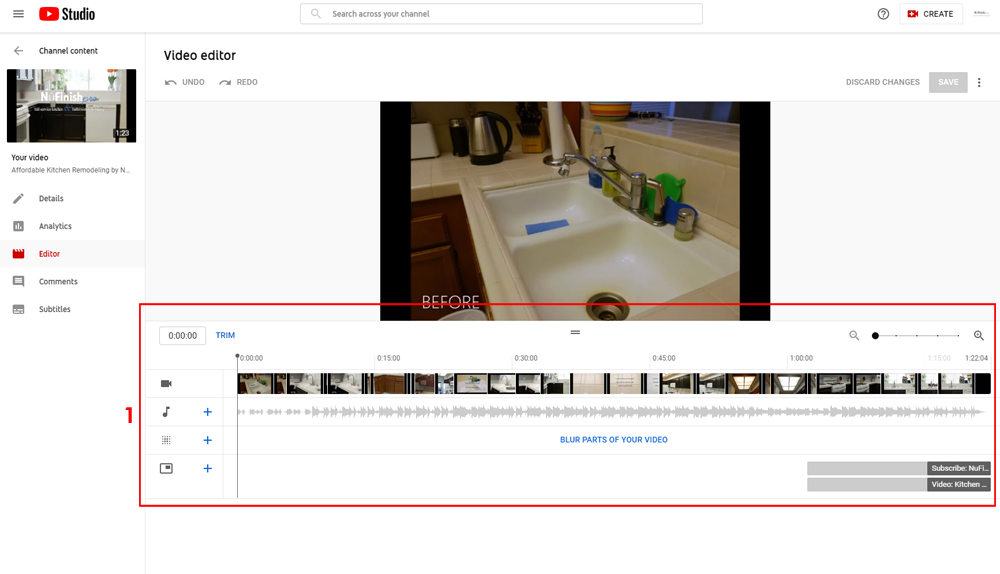
YouTube has provided you with a simple editor, this is not a replacement for a program like Adobe Premiere or Apple Final Cut Pro. But if you want, you can trim the video and make some simple changes to it. The other options available are to blur a part of the content, add some music, or change the length of the end screen. The editor gives you very few options to edit your video.
Video Visibility
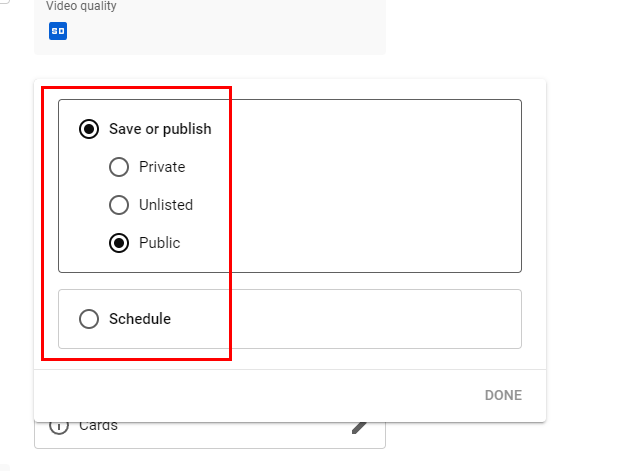
You have the option to change the status of your video, click on the default public icon to open a drop-down menu. To begin, make the item either Private, Unlisted, or Public, if you want to have the video visible to all of YouTube, then choose Public. Finally, click on done to save the changes that have been made.
Video Subtitles
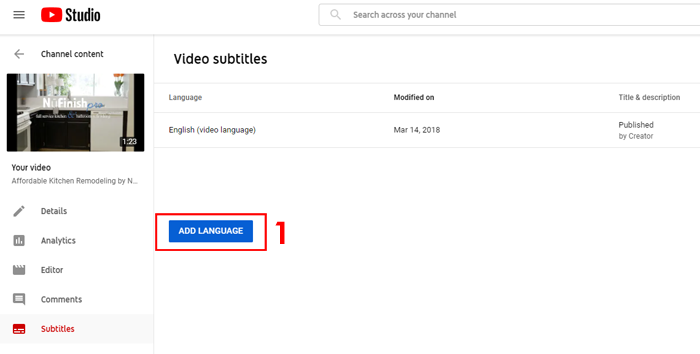
YouTube will allow you to add subtitles, choose a language, click on the “add language” button to add the desired language. If you don’t choose a default language, subtitles will not be active. To fix this problem, choose a default language for your content to solve the problem.
Auto Sync
Type or paste in a full transcript of the video and subtitle timings will be set automatically.
Type Manually
Create subtitles and closed captions by typing them in as you watch the video.
Useful Information
Upload file
https://support.google.com/youtube/answer/2734698?hl=en
Use automatic captioning
https://support.google.com/youtube/answer/6373554?hl=en